Unlocking the Secrets of LoRA in Stable Diffusion: A Guide
Written on

In my earlier exploration, I ventured into the intriguing task of training a LoRA model that closely mirrors the iconic Hollywood actress, Scarlett Johansson.
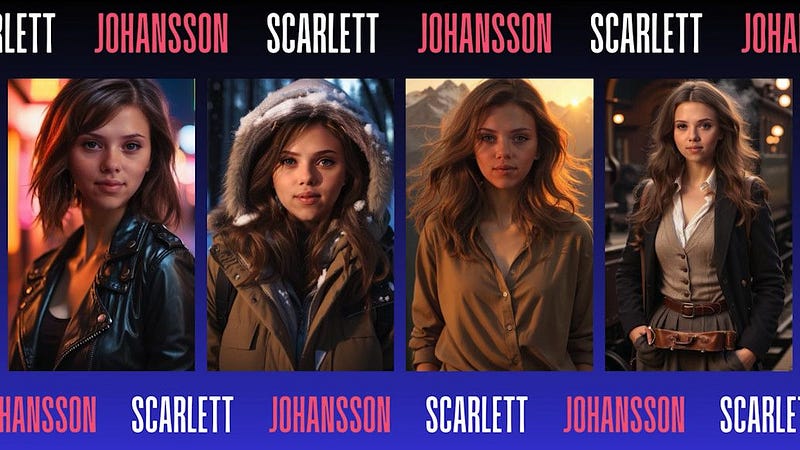
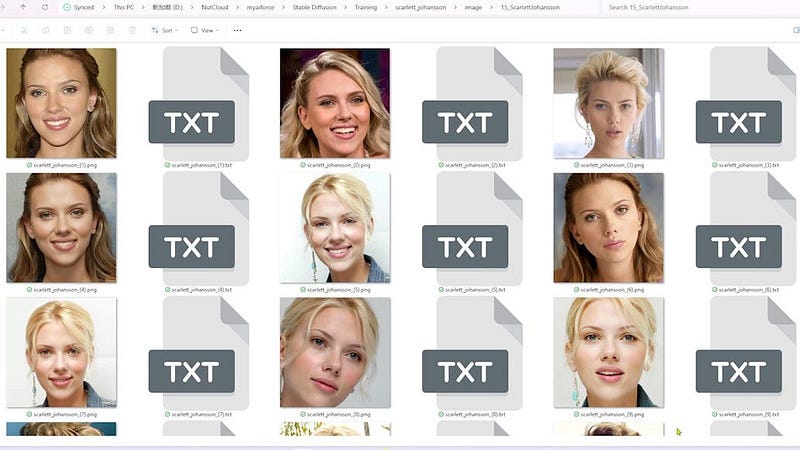
Focusing on her headshots enabled the AI to intricately learn her facial characteristics, which allowed for the creation of images that closely replicate her likeness.
However, despite successfully capturing her facial features, I faced challenges when attempting to create half or full-body images. The addition of LoRA to these prompts often resulted in images that failed to encapsulate Scarlett's essence.
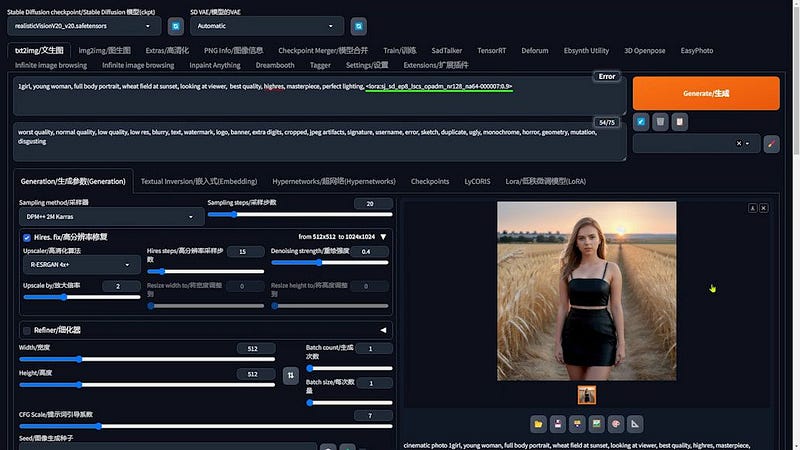
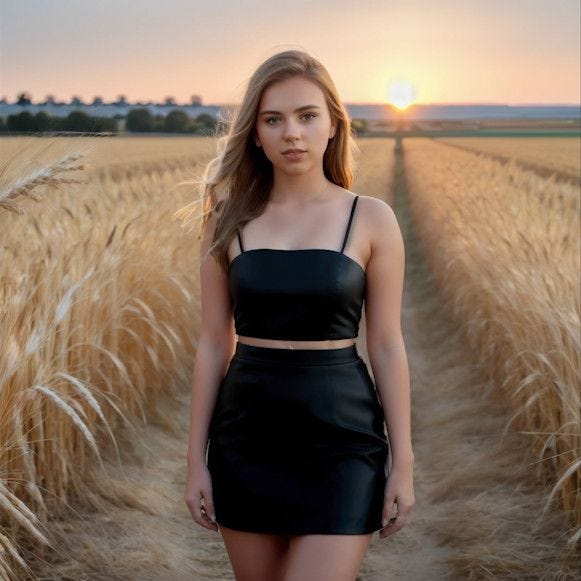
Moreover, my training on the SD1.5 base model limited my ability to generate images using other versions.
To address these challenges, I present the ADetailer extension, a powerful tool that allows your trained LoRA model to utilize any base model for generating a variety of photographic styles.
ADetailer operates by isolating facial features from images, employing the headshot generated by LoRA for a seamless face swap.
Here are three original images utilized for the face swap:
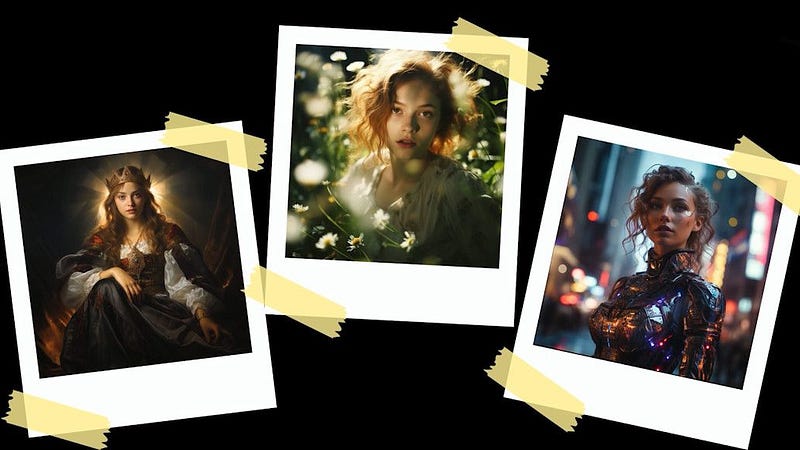
And here’s the remarkable outcome after applying Scarlett Johansson’s LoRA model for the face swap:

The transformation is truly impressive. Let's explore how you can achieve similar results using ADetailer and LoRA.
For those interested in visual learning, check out this informative video tutorial that accompanies this guide:
# Mastering Face Swaps with LoRA and ADetailer Embark on a journey to master face swapping with the ADetailer extension and LoRA models through an easy-to-follow process.
I. Getting Started
Before diving in, ensure that the ADetailer extension is properly installed. If you're unfamiliar with the installation process, refer to the detailed guide in my previous article.
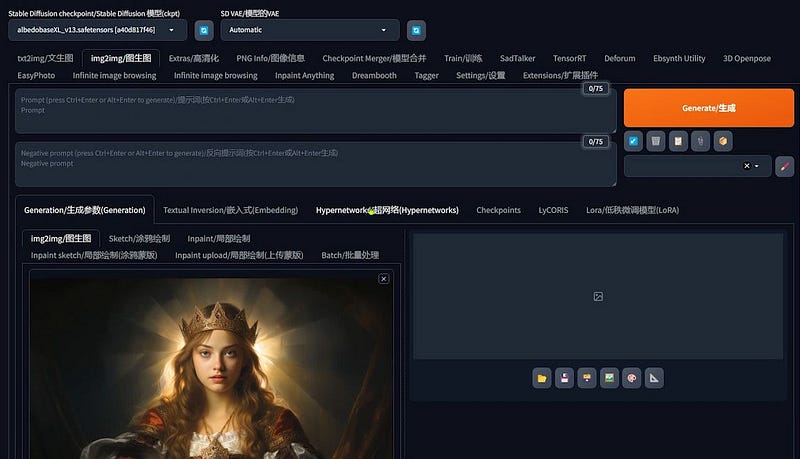
II. Uploading and Configuring
Head to the img2img interface on A1111 to initiate the face swap process:
- Upload the base image you want to alter.
- Choose any base model; ADetailer’s flexibility allows for diverse selections.
- Keep the prompt area empty, allowing ADetailer to manage the face swap intricacies.
III. Sampling Method and Steps
- Select a Sampling method that aligns with your needs; each method has a subtle impact on the results.
- Adjust the Sampling steps to find a balance between detail and processing time.
IV. Image Parameters and Adjustments
- Utilize the “Triangle Ruler” to automatically adjust the image dimensions to the original size for authenticity.
- Configure the “CFG Scale” and “Denoising strength” according to your preference; these settings won’t affect the ADetailer face swap effect. Setting a “Denoising strength” of 0 can simplify the ADetailer setup.
V. Setting Up ADetailer
- Begin by locating the ADetailer extension section on the interface and expand it to see all options.
- Activate ADetailer by enabling it; this step is essential. Additionally, select the option to skip the img2img step, ensuring changes are applied solely to the facial area, which boosts process efficiency.
- Choose an appropriate ADetailer model for your project, such as face_yolov8m or face_yolov8n, tailored to specific needs.
- Include the name of your LoRA model in the prompt section to ensure the face swap aligns accurately with your intentions.
VI. Fine-Tuning and Image Generation
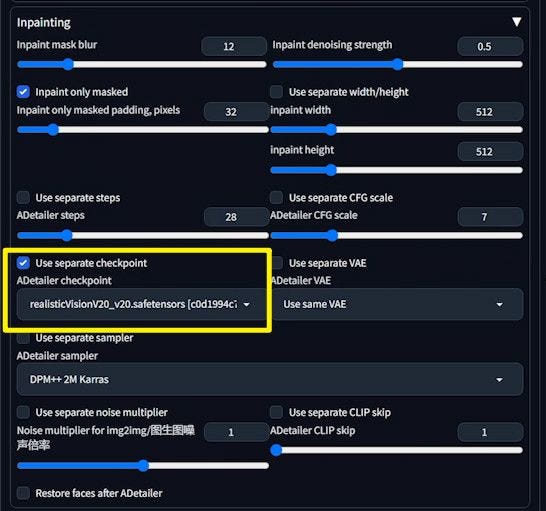
- Access the “Inpainting” tab to adjust the “inpaint mask blur.” A slight increase in blur can help blend the swapped face seamlessly with the original image.
- The “Inpaint denoising strength” is also crucial; this setting determines how much the original face area is modified. Starting with a medium value and adjusting based on results is advisable.
VII. Utilizing Different Base Models
- Enable “Use separate checkpoint” to select a different base model from the original LoRA model, enhancing face swapping options.
- Ensure the chosen base model is compatible with the version your LoRA model was trained on.
VIII. Generating and Refining Face Swap Images
Finalize your ADetailer settings and click “Generate” to start the face swap. The preview will highlight the area designated for the swap, allowing for necessary adjustments.
Previewing and Adjusting To ensure the face swap meets your expectations, follow these steps:
Generate Preview: Click the “Generate” button to process the image according to your settings. The preview will display the image, marking the face swap area with a box for reference.
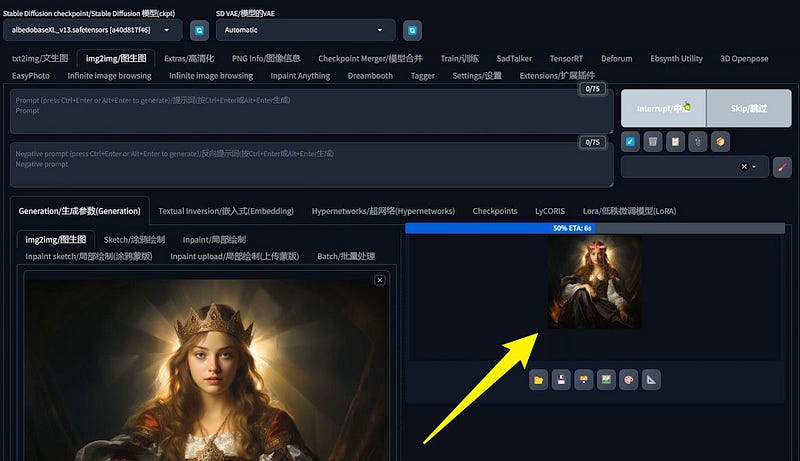
Adjust Face Swap Area Size: If the designated face swap region isn’t quite right, adjustments are straightforward. Expand the “Mask Preprocessing” section to find a slider for altering the dimensions of the swap area, facilitating a more natural integration.
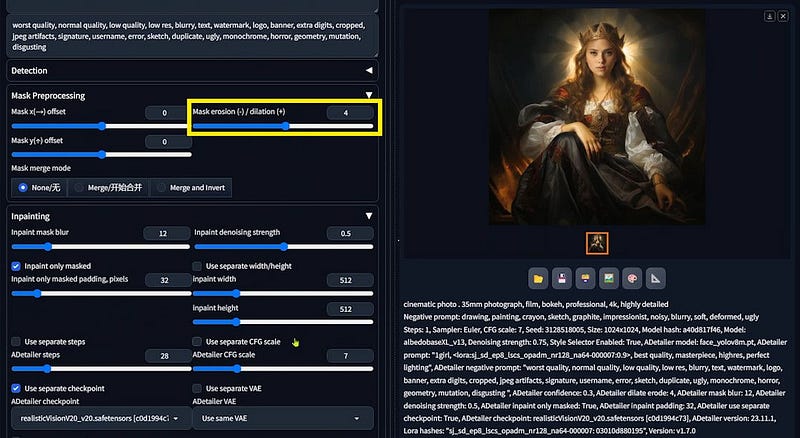
Optimizing the Face Swap Upon reviewing the initial face swap results, you may find areas needing refinement for a seamless blend. Adjusting the “Inpaint denoising strength” in ADetailer settings can significantly smooth the transition between the swapped face and the original background.
Expanding Creative Possibilities with txt2img and ADetailer A notable feature of the ADetailer extension is its versatility across various Stable Diffusion environments. Importantly, ADetailer isn’t limited to img2img operations; it can also be applied to txt2img.
This flexibility allows you to create an image entirely from text descriptions and then utilize ADetailer for a face swap directly within the txt2img framework, maintaining the intuitive process characteristic of img2img while expanding creative avenues.
# Conclusion By following this guide, you’ve gained the skills to effectively use ADetailer and LoRA models for outstanding face swaps. This method not only enhances the capabilities of your LoRA model but also opens up a world of creative possibilities. Thank you for joining me on this tutorial journey.
Interested in more? Explore my collection of Stable Diffusion tutorials!
Did you enjoy this article?
If so, consider: - Leaving a comment - Following my updates - Subscribing for free email alerts