Mastering the iPhone 15 Pro: A Photographer's Comprehensive Guide
Written on
Understanding the iPhone 15 Pro's Photography Features
Apple has introduced several enhancements in the iPhone 15 Pro and Pro Max that cater specifically to photographers. These modifications not only elevate the quality of images but also enhance the overall experience of capturing photos. In this guide, we will explore the essential settings that unleash the full potential of the iPhone's camera, along with tips on how to hold the device for optimal photography.
Key Camera Settings
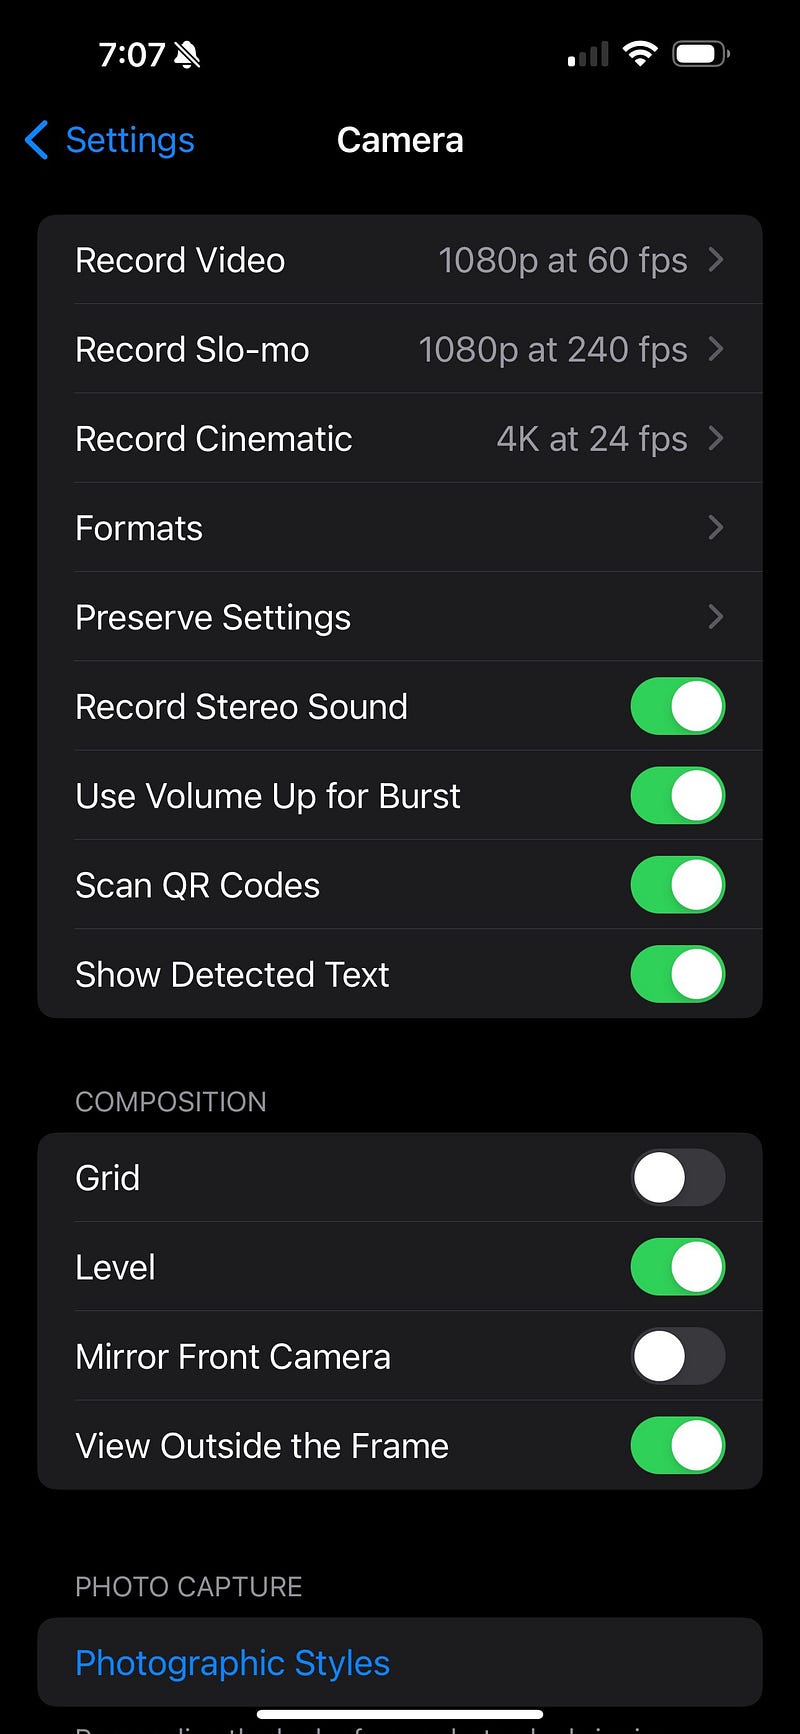
To begin the setup, navigate to Settings > Camera. This guide will concentrate on options for still images, although you will notice other selections in the accompanying screenshots.
Camera Formats
For optimal image capture, select High Efficiency as your default format. This option is superior to Jpeg, providing better quality in smaller file sizes. While HEIF files used to face compatibility issues with editing software, that is no longer the case.
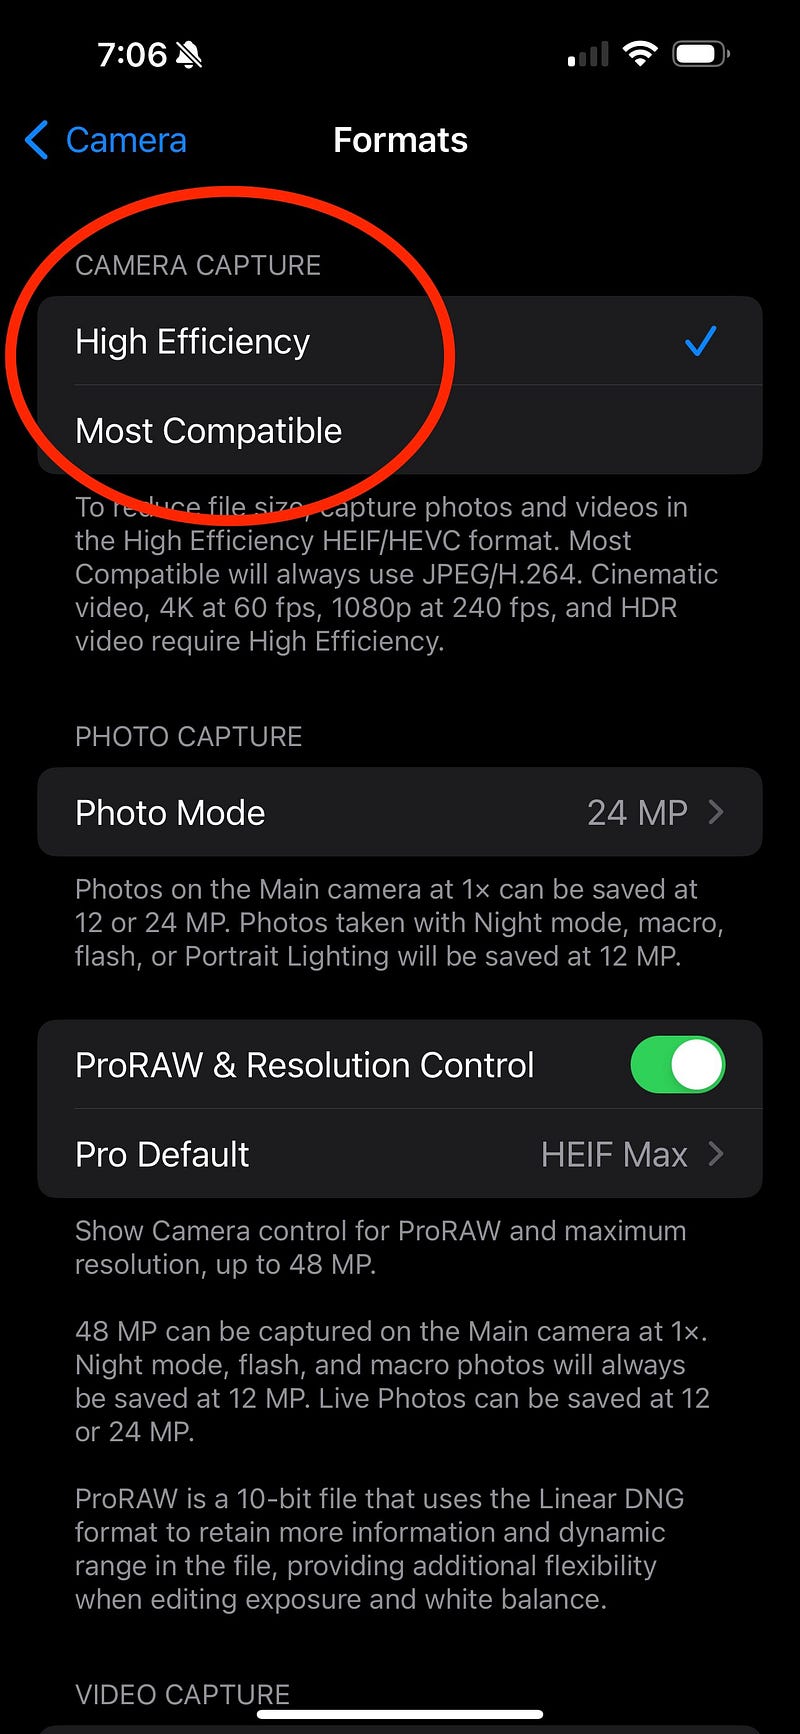
Photo Capture Settings
In Photo Mode, you can choose between 24 MP and 12 MP for the main camera. Opt for 24 MP, as it offers significantly higher resolution with only a minor file size increase. A 24 MP HEIF file is approximately 3 MB, while the 12 MP version is about 2 MB.
ProRAW and Resolution Options
Make sure to enable the ProRAW & Resolution Control feature. You will see three format options: HEIF Max (up to 48 MP), ProRAW at 12 MP, and ProRAW Max (up to 48 MP). Your choice should align with your image editing needs. For high resolution without extensive post-processing, HEIF Max is ideal. Conversely, if you prefer a RAW editing approach, choose the ProRAW format that fits your storage needs.
For my usage, I typically select the 48 MP HEIF for daily photography, as the camera's intelligence minimizes the need for post-editing. For special captures, I switch to ProRAW.
Shooting Preferences
Activate both the "Use Volume Up for Burst" and "Level" features. The burst mode is particularly useful thanks to the new Action Button, which I will elaborate on shortly. The Level option assists in capturing straight horizons.
Photographic Styles
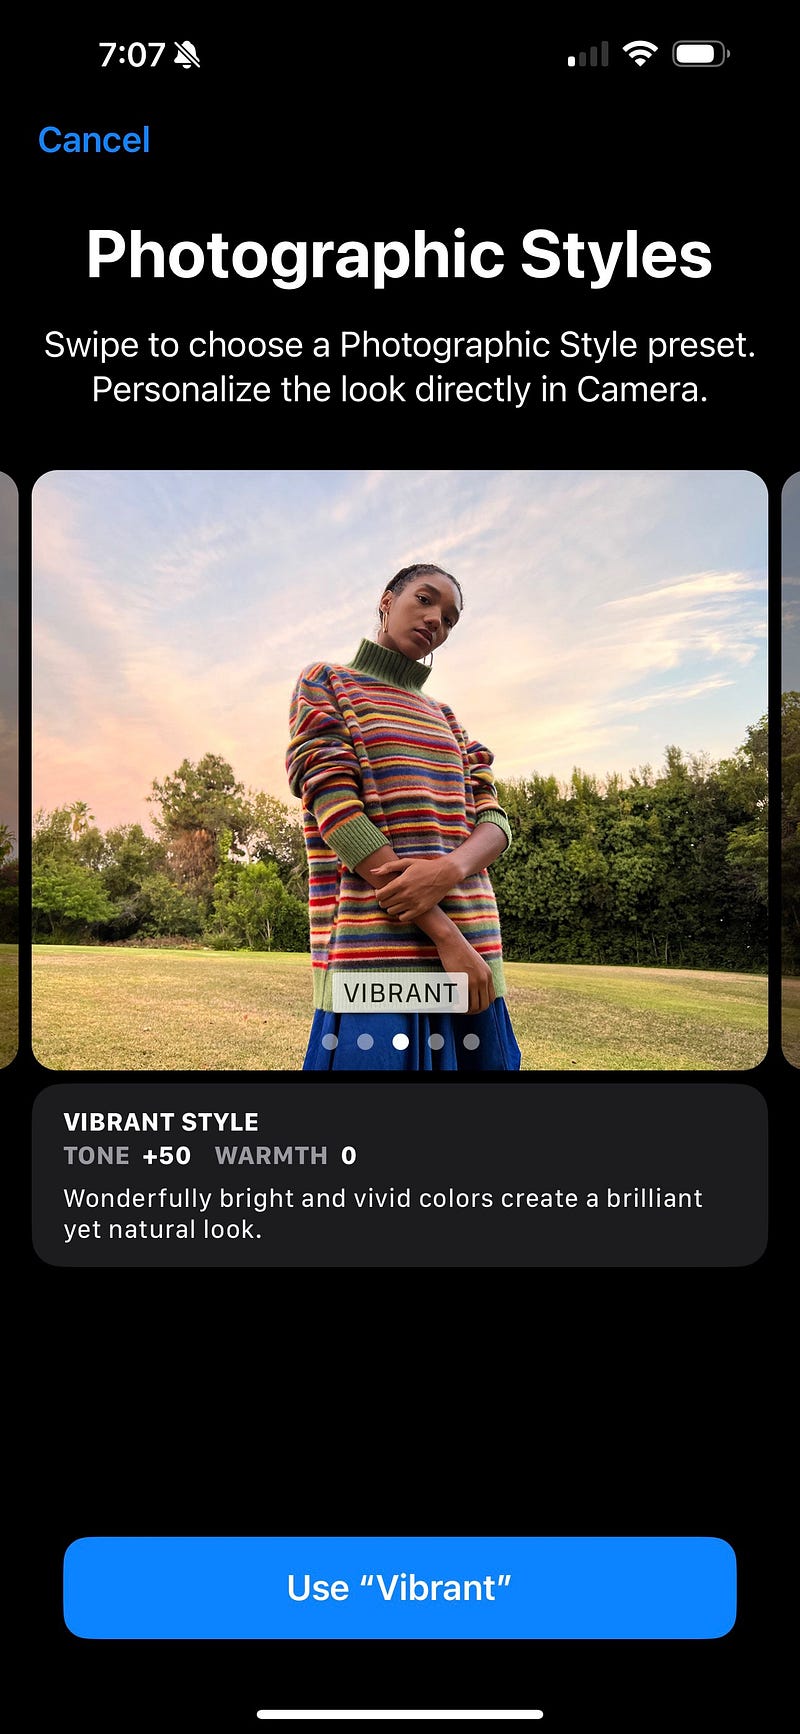
To achieve a consistent aesthetic in your photos, explore the Photographic Styles settings. You can select from five options: Standard, Rich Contrast, Vibrant, Warm, and Cool. Each style comes with an illustrative example to help you decide.
Main Camera Configuration
With the 48 MP resolution, the main camera offers various focal length options. Enable the 28 mm and 35 mm lenses, and select your preferred starting point. Personally, I favor the 35 mm for general photography, as switching between focal lengths is seamless.
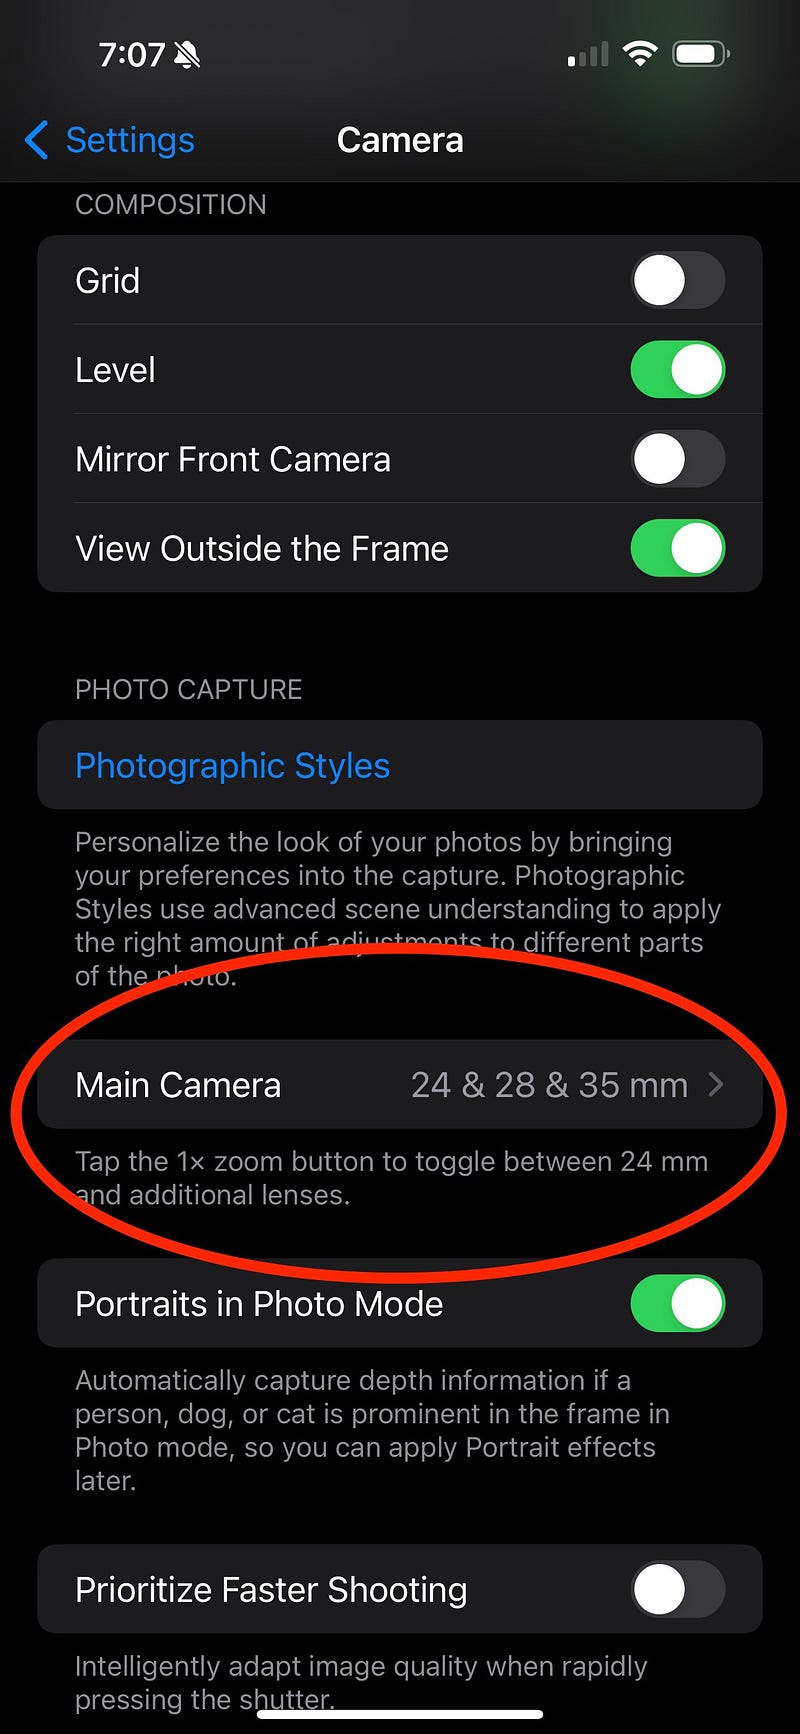
Additionally, consider these settings:
- Prioritize Faster Shooting: Keep this option off unless you are shooting fast-action scenes; it helps maintain image quality.
- Lens Correction: Enable this to reduce distortion from the front and Ultra Wide cameras.
- Macro Control: Turn this on to automatically switch to the Ultra Wide Camera for macro photography.
The Action Button Advantage
The new Action Button, which replaces the mute switch, is a game-changer for photographers. It provides quick access to the camera and can serve as a shutter release or video recorder.
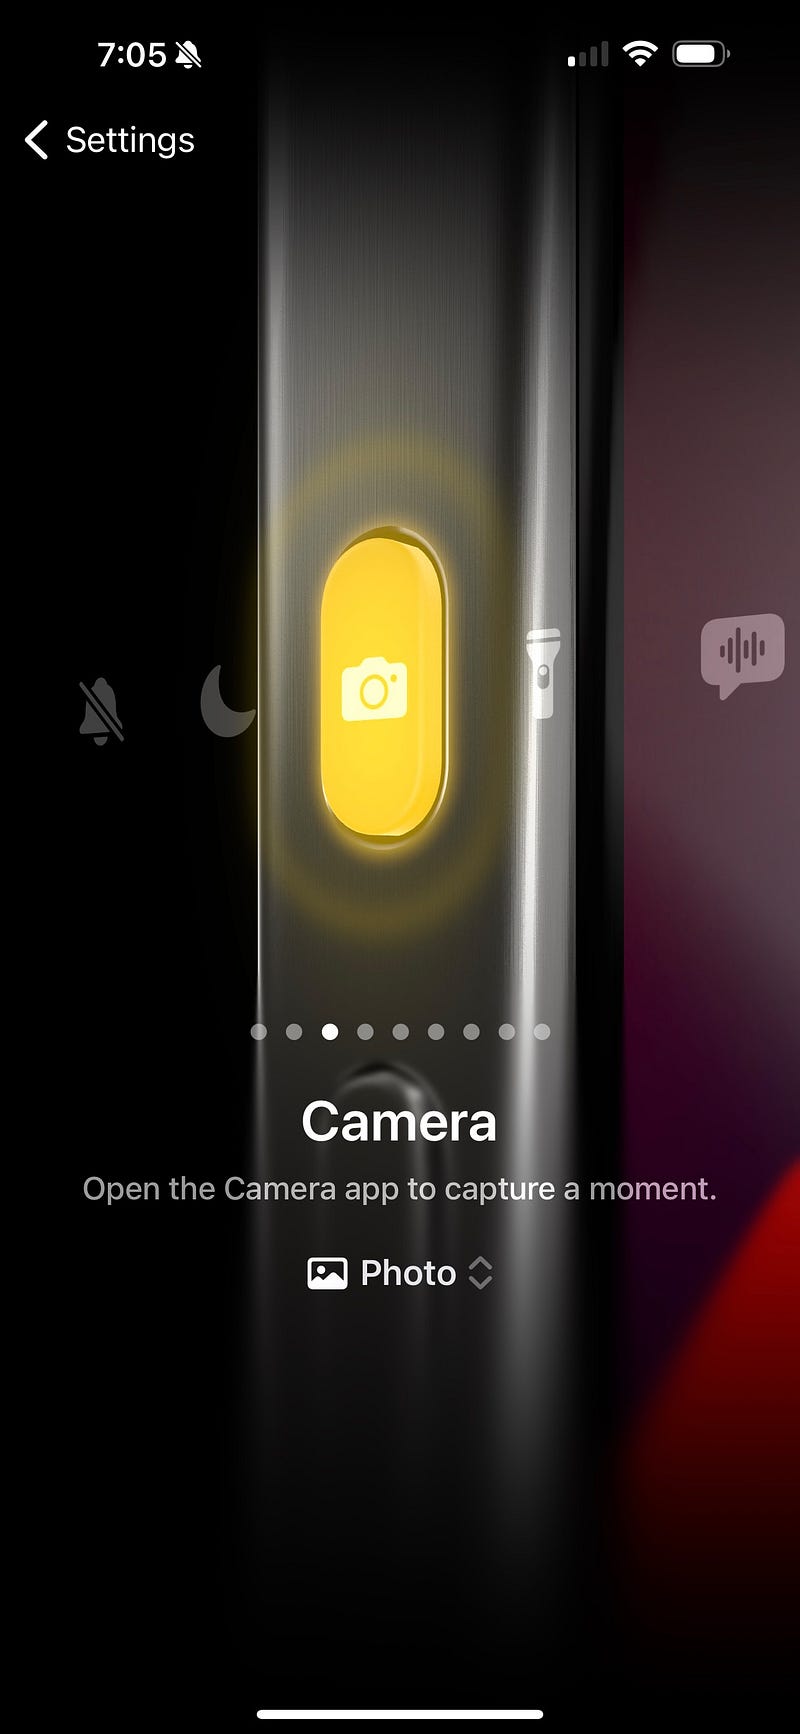
To set it up, go to Settings > Action Button and select Camera from the options. While you can repurpose it for other functions, its camera capability is likely to remain your primary use.
Taking Great Photos with the iPhone
Now that your settings are optimized, let's discuss how to hold the iPhone for photography. For horizontal shots, grip the device with the Action Button facing downward, naturally positioned under your left thumb. The camera lenses will be positioned at the top left. Long-press the Action Button to activate the camera, compose your shot, then click the button to capture the image. To utilize burst mode, slide your thumb right to press the Volume Up button. For video recording, return to the Action Button and long-press.
Focal lengths can be adjusted with your right index finger by tapping the relevant camera options. Use your left index finger to access additional settings, including Live View, Night Mode, and Exposure Compensation.
For vertical photos, simply hold the iPhone upright in your left hand, following the same button-pressing technique.
Final Thoughts
The iPhone 15 Pro and Pro Max can genuinely serve as advanced cameras for dedicated photography enthusiasts, provided they are set up correctly. These adjustments, combined with Apple's new features, position the iPhone 15 Pro as one of the most capable smartphone cameras to date.
Enjoy capturing stunning images!
Bonus: Sample Photography
Here are some unedited sample images showcasing different focal lengths of the iPhone 15 Pro Max. In the first series, I maintained my position while adjusting the camera settings for various perspectives.


In the second series, I moved the camera closer to the subject for each shot, activating the automatic macro feature.


All photographs by Derrick Story.
More from Live View
All of our contributors are passionate photographers. Explore their stunning images and insights in the Live View publication on Medium.com.
The first video titled "The PERFECT iPhone Camera Settings For Incredible Photos" offers a detailed walkthrough of optimal settings that enhance your photography experience.
The second video, "iPhone 15 Pro / Max Best Camera Settings - Tips & Tricks," provides practical tips to help you make the most of your iPhone camera's features.